对Next主题进行详细配置
打开我的博客,我的第一感觉是拒绝的,hexo的默认主题算不上难看,但是
因为我就要做博客中最靓的仔,万一哪天,这个博客的主题影响我单手开法拉利,这就很麻烦了。

于是我决定换个主题。
更换主题
hexo官网上的主题还真不少,我就选择了Next,毕竟好看啊。
Next的Github:https://github.com/theme-next/hexo-theme-next
进入Next的Github中可以找到最新版本,下载下来(记得下载zip的,因为用的windows)。
打开_config.yml文件,翻到最后,有个theme,改成theme: next。
然后把下载好的压缩包解压出来,放在博客themes路径下。
然后hexo g重新生成,在本地中就可以打开了(又一次套娃成功)。
当然也挺丑,但还可以自定义改一下。通过主题配置文件可以进一步自定义。
继续美化
经过一天的努力,我终于把博客弄得漂亮一点了(这真的比游戏还肝)。
接下来我就总结一下我大概的修改的地方。
由于主要是修改_config.yml文件,所以还比较简单。但一些骚操作就需要动用html、css、javascript代码,幸好我学过。
主题样式
next提供了四种主题样式,这四种我都看过,但我最终选择了Gemini样式。
1 | # Schemes |
菜单栏详细设置
菜单栏需要显示出来并附上超级链接。
配置
我需要设置一些菜单的选项,菜单设置的格式是三个部分:选项标签: 路径 || 图标名,针对这三个我要说明一下:
- 选项标签可以自定义,自定义需要在languages文件夹下修改对应的名称。
- 路径是
/source路径下的文件。 - 图标名称需要根据Font Awesome的名字来选择。
1 | menu: |
附上链接
只有选项还是不够,点进去会出现404的情况。
用选项“标签”来举个例子,首先需要新建一个页面,在CMD中输入如下指令:
1 | hexo new page tags |
这里的tags是新建文件夹的名称,这个文件夹下会出现一个index.md文件。
打开index.md文件,提亲写好了Front-matter,改成如下规则:
1 | --- |
一定要加上type: "tags"这几个文字,这样会识别成tags文件,直接可以整理好文件的标签。
这样就可以转到tags页面下。
侧边栏设置
我没有去设计复杂的侧边栏,就简单设置了一些。
1 | sidebar: |
回到顶端设置
1 | back2top: |
阅读进度条设置
1 | # Reading progress bar |
添加网易云音乐
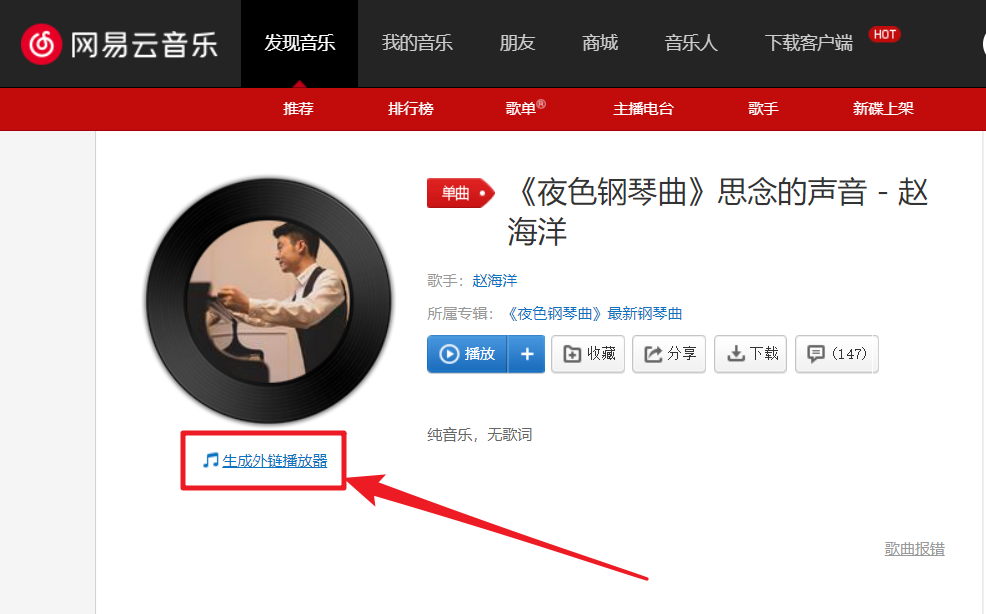
网易云提供了完整的外链播放器,所以我们可以手动添加外链播放器。
首先需要找到自己喜欢的音乐,找到“生成外链播放器”选项。
接下来就根据自己的意愿来设置播放器,这里建议不要自动播放,否则很烦,真的很烦。
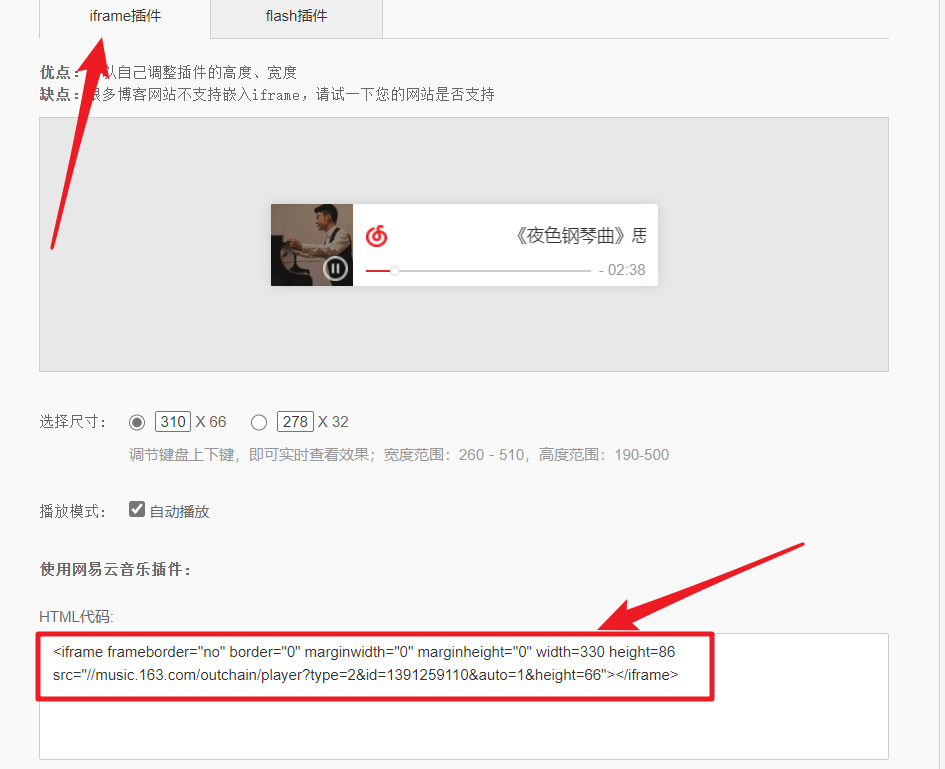
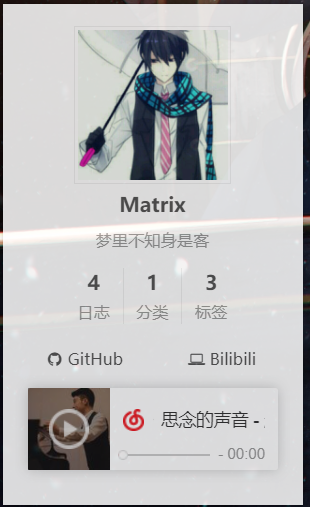
设置好之后,就把下面的代码复制下来。\layout文件夹下的文件可以随便放,不同位置效果不同。我放在了\layout\_macro\sidebar.swig文件中,这是侧边栏的文件,效果如图:
加入背景图
我不该相信next没有提供背景图片更换,那就只能我自己设置了,幸好会一点css。
首先在\source\css下随便找个位置新建一个.styl文件,我放在了\source\css\_custom,我打算以后把自己的样式放在这个文件中。
我新建了个custom.styl文件,放入了以下代码:
1 | // 网站背景(自适应) |
具体解释,我代码中注释好了。这里我整了个骚操作,我在_config.yml文件中新建了几个选项:
1 | # --------------------------------------------------------------- |
我直接在css中调用变量,这样我就可以在_config.yml设置一些东西了。
接下来在source\css\main.styl文件最后添加
1 | //My Layer |
点击效果
爱心效果
这个我很喜欢,我从别人那里拷贝的javascript代码。
首先在source\js文件下创建一个clicklove.js文件,内容如下:
1 | !function(e,t,a){function n(){c(".heart{width: 10px;height: 10px;position: fixed;background: #f00;transform: rotate(45deg);-webkit-transform: rotate(45deg);-moz-transform: rotate(45deg);}.heart:after,.heart:before{content: '';width: inherit;height: inherit;background: inherit;border-radius: 50%;-webkit-border-radius: 50%;-moz-border-radius: 50%;position: fixed;}.heart:after{top: -5px;}.heart:before{left: -5px;}"),o(),r()}function r(){for(var e=0;e<d.length;e++)d[e].alpha<=0?(t.body.removeChild(d[e].el),d.splice(e,1)):(d[e].y--,d[e].scale+=.004,d[e].alpha-=.013,d[e].el.style.cssText="left:"+d[e].x+"px;top:"+d[e].y+"px;opacity:"+d[e].alpha+";transform:scale("+d[e].scale+","+d[e].scale+") rotate(45deg);background:"+d[e].color+";z-index:99999");requestAnimationFrame(r)}function o(){var t="function"==typeof e.onclick&&e.onclick;e.onclick=function(e){t&&t(),i(e)}}function i(e){var a=t.createElement("div");a.className="heart",d.push({el:a,x:e.clientX-5,y:e.clientY-5,scale:1,alpha:1,color:s()}),t.body.appendChild(a)}function c(e){var a=t.createElement("style");a.type="text/css";try{a.appendChild(t.createTextNode(e))}catch(t){a.styleSheet.cssText=e}t.getElementsByTagName("head")[0].appendChild(a)}function s(){return"rgb("+~~(255*Math.random())+","+~~(255*Math.random())+","+~~(255*Math.random())+")"}var d=[];e.requestAnimationFrame=function(){return e.requestAnimationFrame||e.webkitRequestAnimationFrame||e.mozRequestAnimationFrame||e.oRequestAnimationFrame||e.msRequestAnimationFrame||function(e){setTimeout(e,1e3/60)}}(),n()}(window,document); |
之后打开layout\_layout.swig,在</body>上面写下如下代码:
1 | <!-- 页面点击小红心 --> |
这样就完成了,每次鼠标点击都会出现爱心。
爆炸效果
同样先在source\js文件下创建一个fireworks.js文件,内容如下:
1 | ;function updateCoords(e){pointerX=(e.clientX||e.touches[0].clientX)-canvasEl.getBoundingClientRect().left,pointerY=e.clientY||e.touches[0].clientY-canvasEl.getBoundingClientRect().top}function setParticuleDirection(e){var t=anime.random(0,360)*Math.PI/180,a=anime.random(50,180),n=[-1,1][anime.random(0,1)]*a;return{x:e.x+n*Math.cos(t),y:e.y+n*Math.sin(t)}}function createParticule(e,t){var a={};return a.x=e,a.y=t,a.color=colors[anime.random(0,colors.length-1)],a.radius=anime.random(16,32),a.endPos=setParticuleDirection(a),a.draw=function(){ctx.beginPath(),ctx.arc(a.x,a.y,a.radius,0,2*Math.PI,!0),ctx.fillStyle=a.color,ctx.fill()},a}function createCircle(e,t){var a={};return a.x=e,a.y=t,a.color="#F00",a.radius=0.1,a.alpha=0.5,a.lineWidth=6,a.draw=function(){ctx.globalAlpha=a.alpha,ctx.beginPath(),ctx.arc(a.x,a.y,a.radius,0,2*Math.PI,!0),ctx.lineWidth=a.lineWidth,ctx.strokeStyle=a.color,ctx.stroke(),ctx.globalAlpha=1},a}function renderParticule(e){for(var t=0;t<e.animatables.length;t++){e.animatables[t].target.draw()}}function animateParticules(e,t){for(var a=createCircle(e,t),n=[],i=0;i<numberOfParticules;i++){n.push(createParticule(e,t))}anime.timeline().add({targets:n,x:function(e){return e.endPos.x},y:function(e){return e.endPos.y},radius:0.1,duration:anime.random(1200,1800),easing:"easeOutExpo",update:renderParticule}).add({targets:a,radius:anime.random(80,160),lineWidth:0,alpha:{value:0,easing:"linear",duration:anime.random(600,800)},duration:anime.random(1200,1800),easing:"easeOutExpo",update:renderParticule,offset:0})}function debounce(e,t){var a;return function(){var n=this,i=arguments;clearTimeout(a),a=setTimeout(function(){e.apply(n,i)},t)}}var canvasEl=document.querySelector(".fireworks");if(canvasEl){var ctx=canvasEl.getContext("2d"),numberOfParticules=30,pointerX=0,pointerY=0,tap="mousedown",colors=["#FF1461","#18FF92","#5A87FF","#FBF38C"],setCanvasSize=debounce(function(){canvasEl.width=2*window.innerWidth,canvasEl.height=2*window.innerHeight,canvasEl.style.width=window.innerWidth+"px",canvasEl.style.height=window.innerHeight+"px",canvasEl.getContext("2d").scale(2,2)},500),render=anime({duration:1/0,update:function(){ctx.clearRect(0,0,canvasEl.width,canvasEl.height)}});document.addEventListener(tap,function(e){"sidebar"!==e.target.id&&"toggle-sidebar"!==e.target.id&&"A"!==e.target.nodeName&&"IMG"!==e.target.nodeName&&(render.play(),updateCoords(e),animateParticules(pointerX,pointerY))},!1),setCanvasSize(),window.addEventListener("resize",setCanvasSize,!1)}"use strict";function updateCoords(e){pointerX=(e.clientX||e.touches[0].clientX)-canvasEl.getBoundingClientRect().left,pointerY=e.clientY||e.touches[0].clientY-canvasEl.getBoundingClientRect().top}function setParticuleDirection(e){var t=anime.random(0,360)*Math.PI/180,a=anime.random(50,180),n=[-1,1][anime.random(0,1)]*a;return{x:e.x+n*Math.cos(t),y:e.y+n*Math.sin(t)}}function createParticule(e,t){var a={};return a.x=e,a.y=t,a.color=colors[anime.random(0,colors.length-1)],a.radius=anime.random(16,32),a.endPos=setParticuleDirection(a),a.draw=function(){ctx.beginPath(),ctx.arc(a.x,a.y,a.radius,0,2*Math.PI,!0),ctx.fillStyle=a.color,ctx.fill()},a}function createCircle(e,t){var a={};return a.x=e,a.y=t,a.color="#F00",a.radius=0.1,a.alpha=0.5,a.lineWidth=6,a.draw=function(){ctx.globalAlpha=a.alpha,ctx.beginPath(),ctx.arc(a.x,a.y,a.radius,0,2*Math.PI,!0),ctx.lineWidth=a.lineWidth,ctx.strokeStyle=a.color,ctx.stroke(),ctx.globalAlpha=1},a}function renderParticule(e){for(var t=0;t<e.animatables.length;t++){e.animatables[t].target.draw()}}function animateParticules(e,t){for(var a=createCircle(e,t),n=[],i=0;i<numberOfParticules;i++){n.push(createParticule(e,t))}anime.timeline().add({targets:n,x:function(e){return e.endPos.x},y:function(e){return e.endPos.y},radius:0.1,duration:anime.random(1200,1800),easing:"easeOutExpo",update:renderParticule}).add({targets:a,radius:anime.random(80,160),lineWidth:0,alpha:{value:0,easing:"linear",duration:anime.random(600,800)},duration:anime.random(1200,1800),easing:"easeOutExpo",update:renderParticule,offset:0})}function debounce(e,t){var a;return function(){var n=this,i=arguments;clearTimeout(a),a=setTimeout(function(){e.apply(n,i)},t)}}var canvasEl=document.querySelector(".fireworks");if(canvasEl){var ctx=canvasEl.getContext("2d"),numberOfParticules=30,pointerX=0,pointerY=0,tap="mousedown",colors=["#FF1461","#18FF92","#5A87FF","#FBF38C"],setCanvasSize=debounce(function(){canvasEl.width=2*window.innerWidth,canvasEl.height=2*window.innerHeight,canvasEl.style.width=window.innerWidth+"px",canvasEl.style.height=window.innerHeight+"px",canvasEl.getContext("2d").scale(2,2)},500),render=anime({duration:1/0,update:function(){ctx.clearRect(0,0,canvasEl.width,canvasEl.height)}});document.addEventListener(tap,function(e){"sidebar"!==e.target.id&&"toggle-sidebar"!==e.target.id&&"A"!==e.target.nodeName&&"IMG"!==e.target.nodeName&&(render.play(),updateCoords(e),animateParticules(pointerX,pointerY))},!1),setCanvasSize(),window.addEventListener("resize",setCanvasSize,!1)}; |
之后打开layout\_layout.swig,在</body>上面写下如下代码:
1 | <!-- 页面点击爆炸 --> |
这样就完成了,每次鼠标点击都会出现爆炸效果。
合并
重新更改一些:
layout\_layout.swig,在</body>下代码:
1 | {% if theme.click.fireworks %} |
_config.yml文件加入这些:
1 | # Fireworks |
我又可以在这里骚操作了。
 微信
微信 支付宝
支付宝